This post was originally published by me on www.sentialabs.io, it has been slightly adapted to better fit my personal site.
Before you can use Locksmith, you must create an IAM user and configure Locksmith with its credentials. Locksmith can be both used stand-alone and managed by a service. Here we show how to use Locksmith as a stand-alone tool.
Because of the nature how assuming a role works, it is important that you use a personal account (i.e., an account that nobody else has access to) for creating your IAM user!
It is strongly recommend creating a new account dedicated to holding this single IAM user.
Create an IAM user
First, we are going to create an IAM user. The only function this user is going to fulfil is assuming roles in other AWS accounts. You MUST create this new IAM user in a new personal account, dedicated to nothing else than holding this single IAM user. You must not do anything else with this account (except enabling CloudTrail).
Create an IAM user:
- Choose access type “Programmatic access” only
- Do not select “AWS Management Console access”
- Choose “Attach existing policies directly”
- Click “Create policy”
- Click “Create Your Own Policy”, and fill the fields as follows:
- Policy Name: stsAssumeRole
- Description: Allow assuming IAM Roles.
-
Policy Document:
{
  "Version": "2012-10-17",
  "Statement": [
    {
      "Effect": "Allow",
      "Action": "sts:AssumeRole",
      "Resource": "*"
    }
  ]
}
- Click “Create Policy”
- Return to the user creation, “Refresh” the list of policies
- Select the “Customer managed” policy “stsAssumeRole” that was just created
- Click “Next: Review”
-
Review the settings:
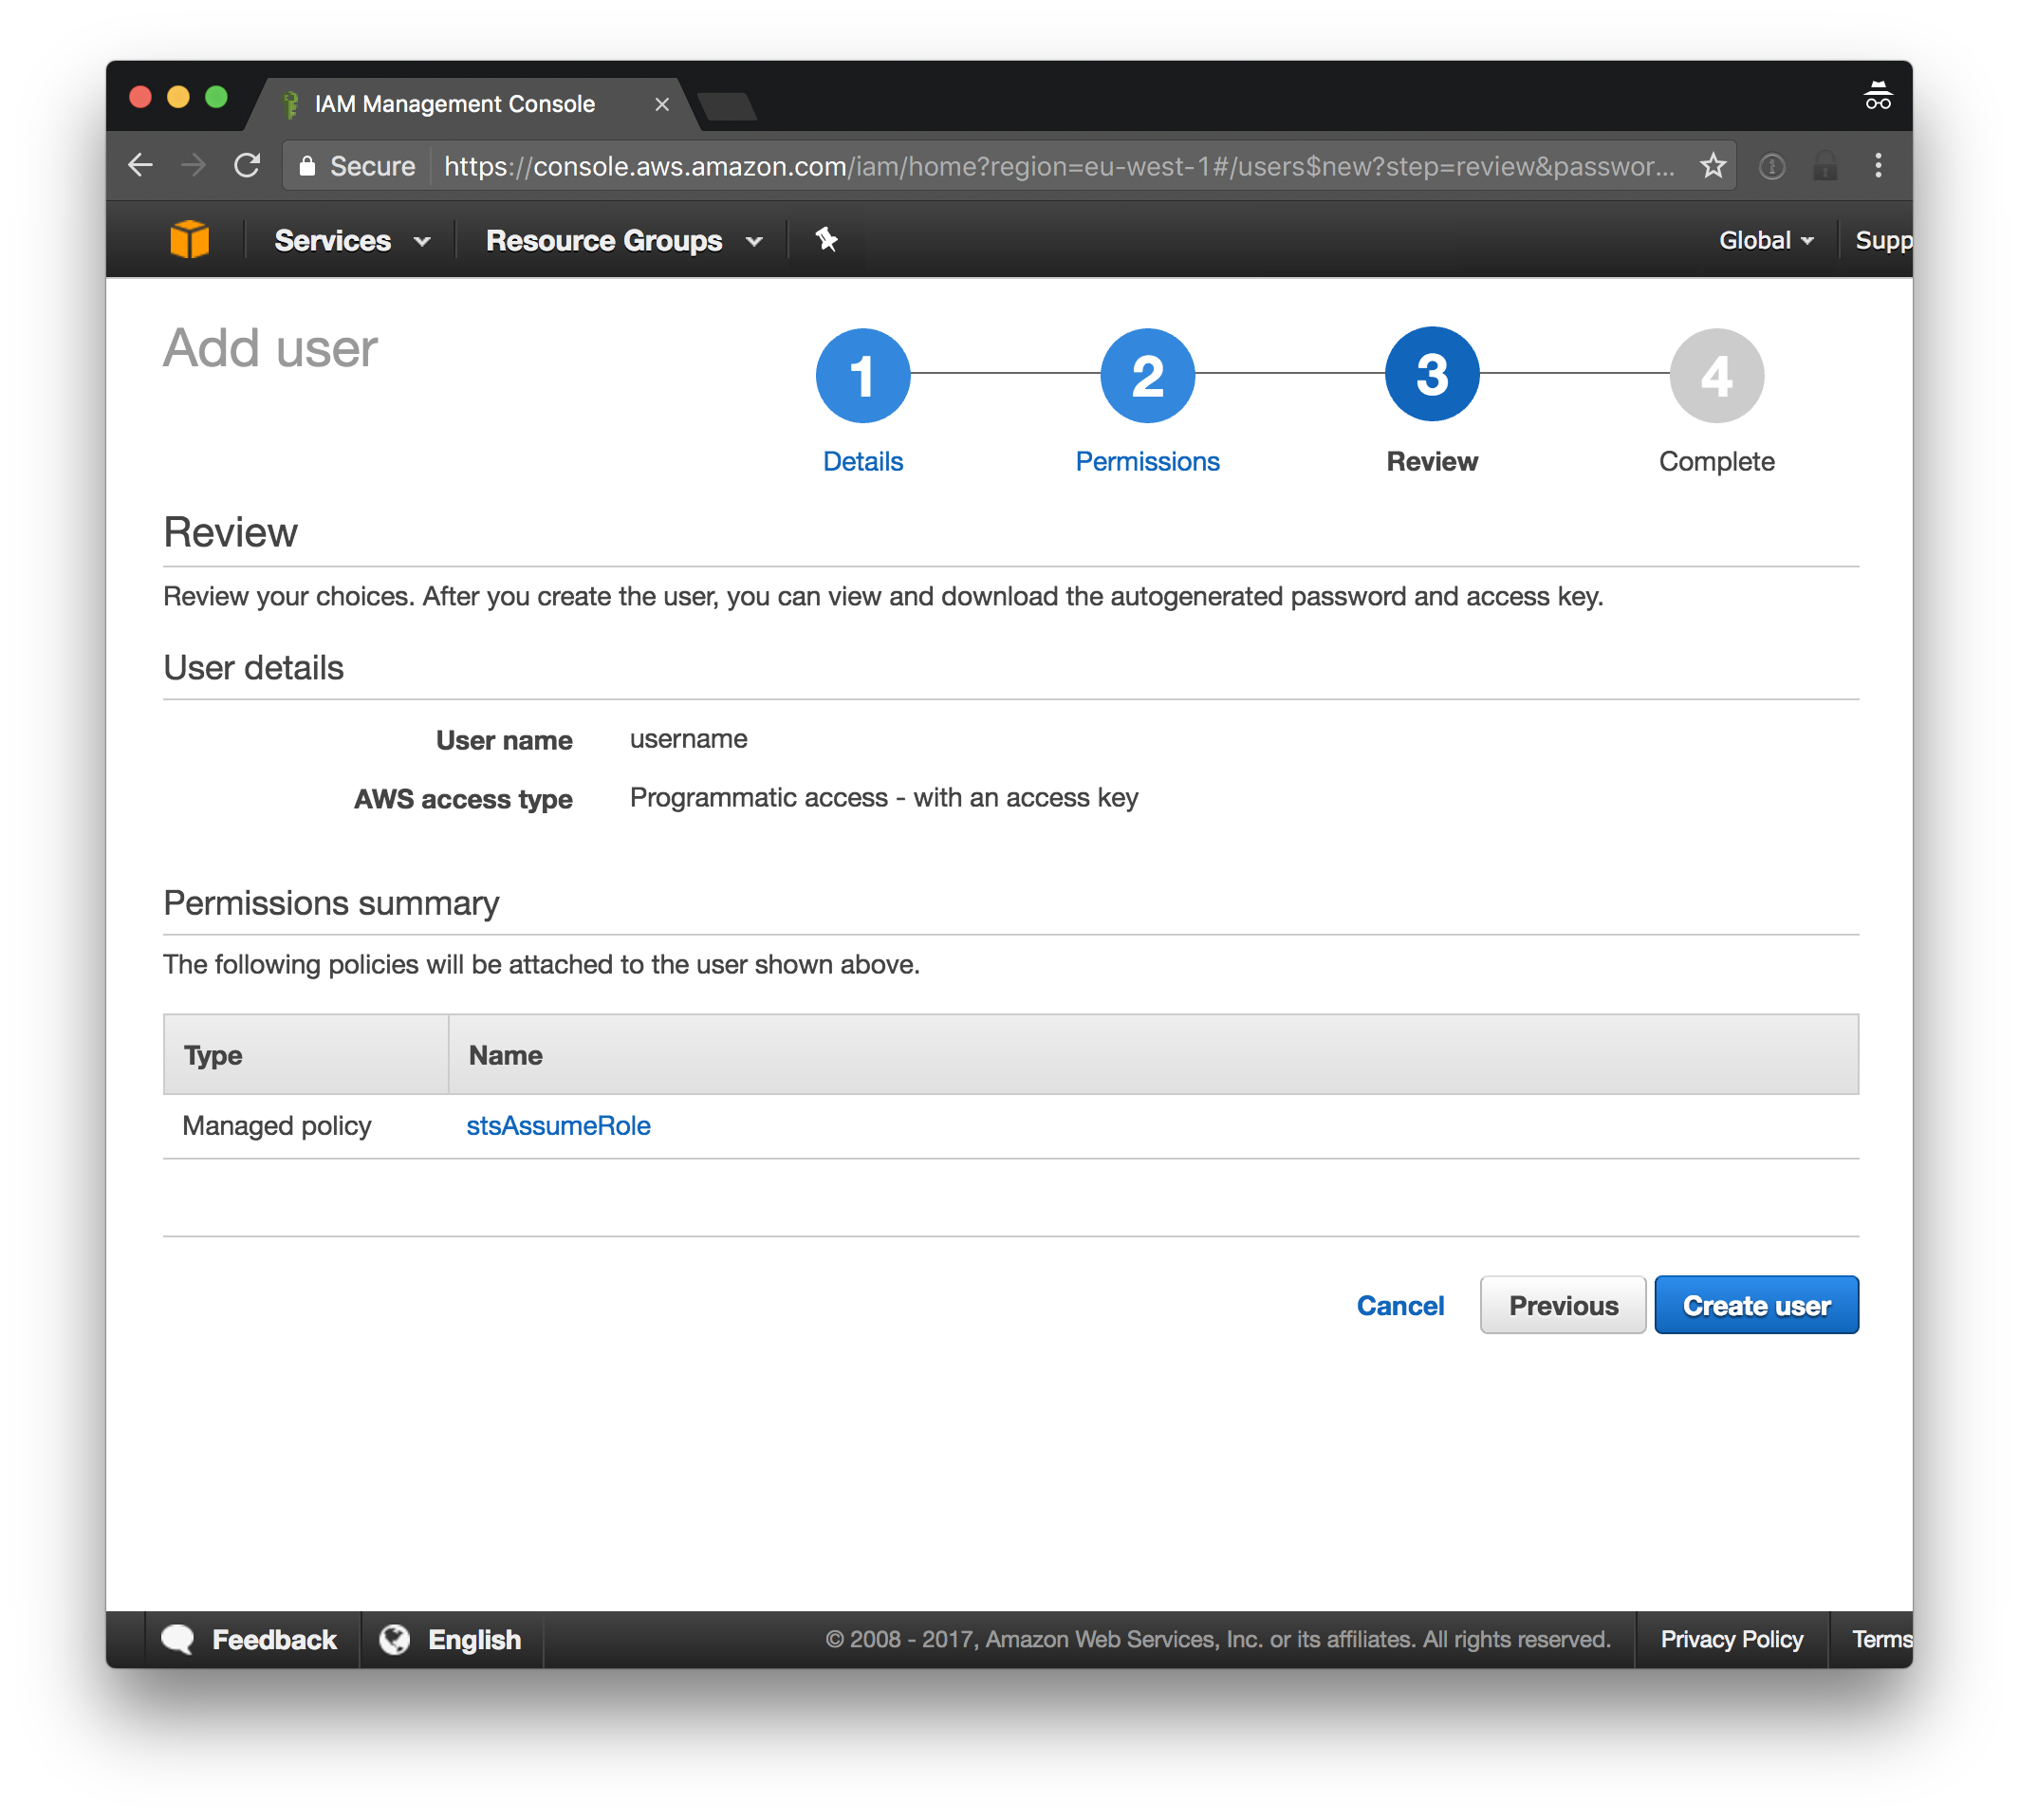
- Click “Create user”
- Safely store the credentials for this user, we are going to need this later
- Find the user that was just created, and open the “Security credentials” tab
- Click the pencil icon next to “Assigned MFA device” to start configuring an MFA token for this IAM user
- Configure a virtual or hardware MFA device
- Make at note of the ARN/serial number of the MFA device
Configure Locksmith
Now we are going to install and configure Locksmith with the credentials of the just created IAM User:
- Install the Locksmith Google Chrome extension: https://chrome.google.com/webstore/detail/locksmith/idahiicmmneinnceklagffdlmgdmdnhc
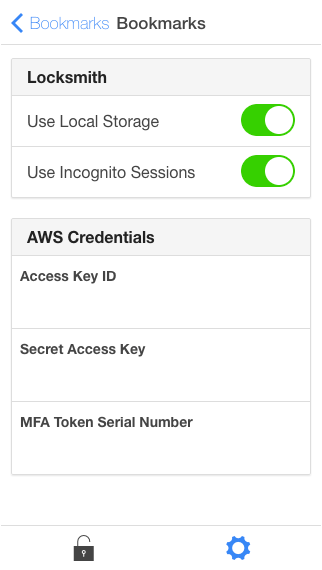
- Navigate to the Locksmith settings:
- Open Locksmith by clicking the lock icon
- Open the settings by clicking the cog-wheel icon
- Set the following settings:
- Use Local Storate: enable
- Access Key ID, Secret Access Key: The credentials of the IAM user you just created
- MFA Serial Number: The serial number of your hardware MFA token, or the ARN of your virtual MFA token.